Photos and mark-up that actually help
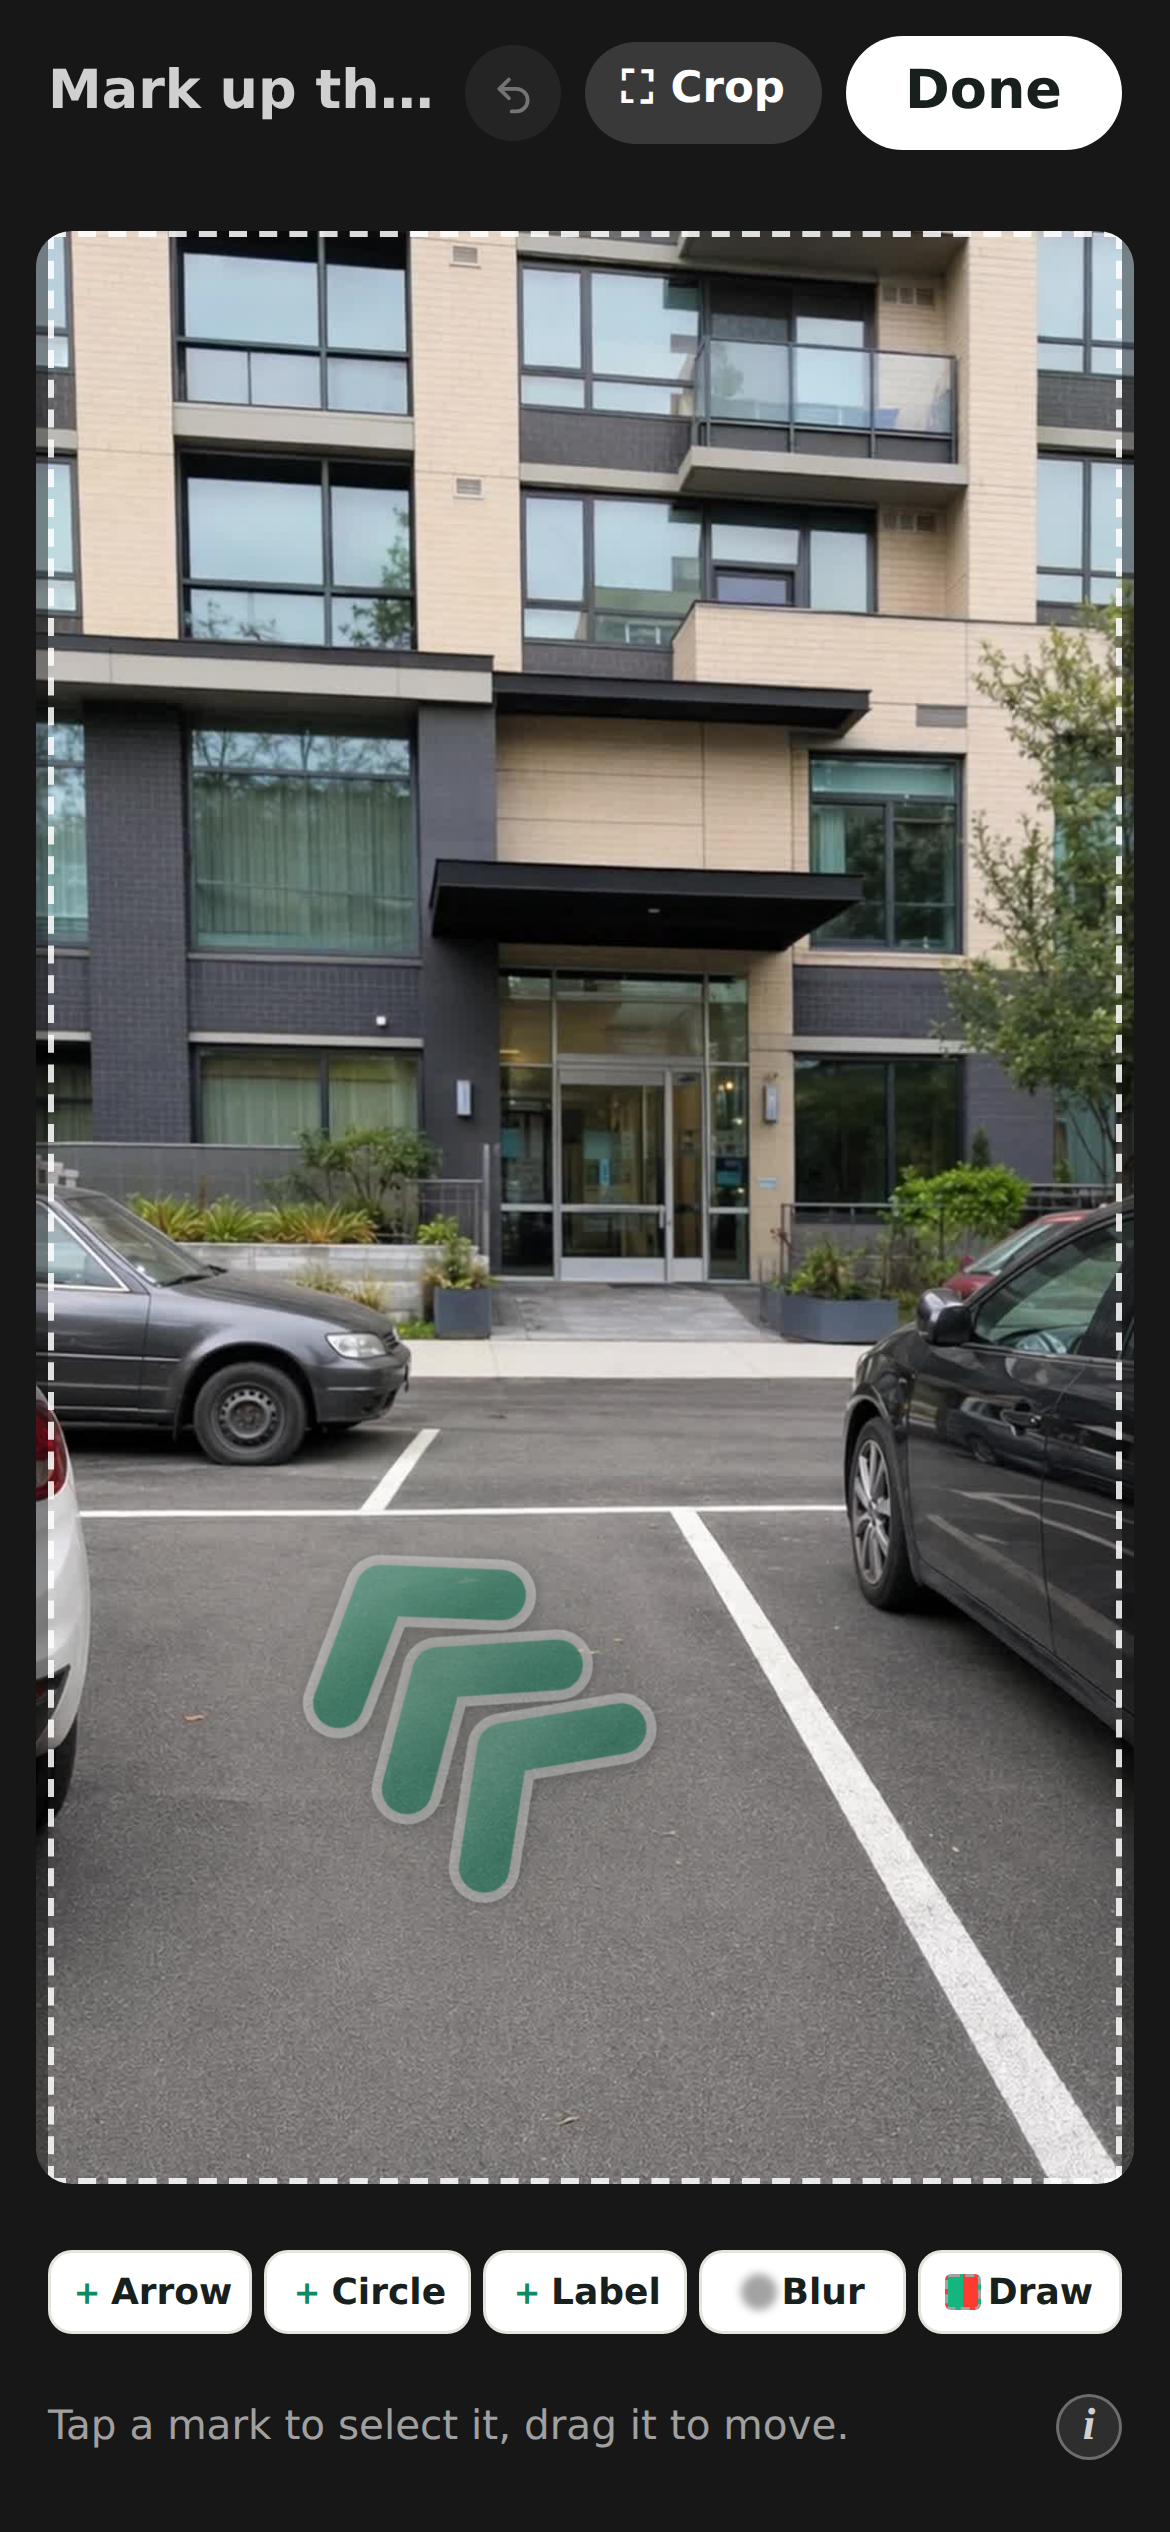
One photo per decision point, an arrow on the thing you mean.
A good guide is short. Four to seven photos is usually the whole story.
How to shoot it
- 1Stand where the visitor will stand and shoot forward, not a wide view of the building.
- 2Take one photo at every point where someone could go the wrong way.
- 3Finish with the door itself, so the last screen matches what they are looking at.
Taking the photos here, one at a time
Tapping Take or choose a photo lets you shoot straight into the guide. A camera hands back one photo per tap, so after each one mikum.me asks whether another is coming: Take another photo keeps the camera going, I'm done ends the run. Nothing is written until you say you are done — that way the instructions are drafted against the whole route, and the photo the guide finishes on is the one you actually finished on.
Mark up the photo
- 1Tap a photo to open the editor.
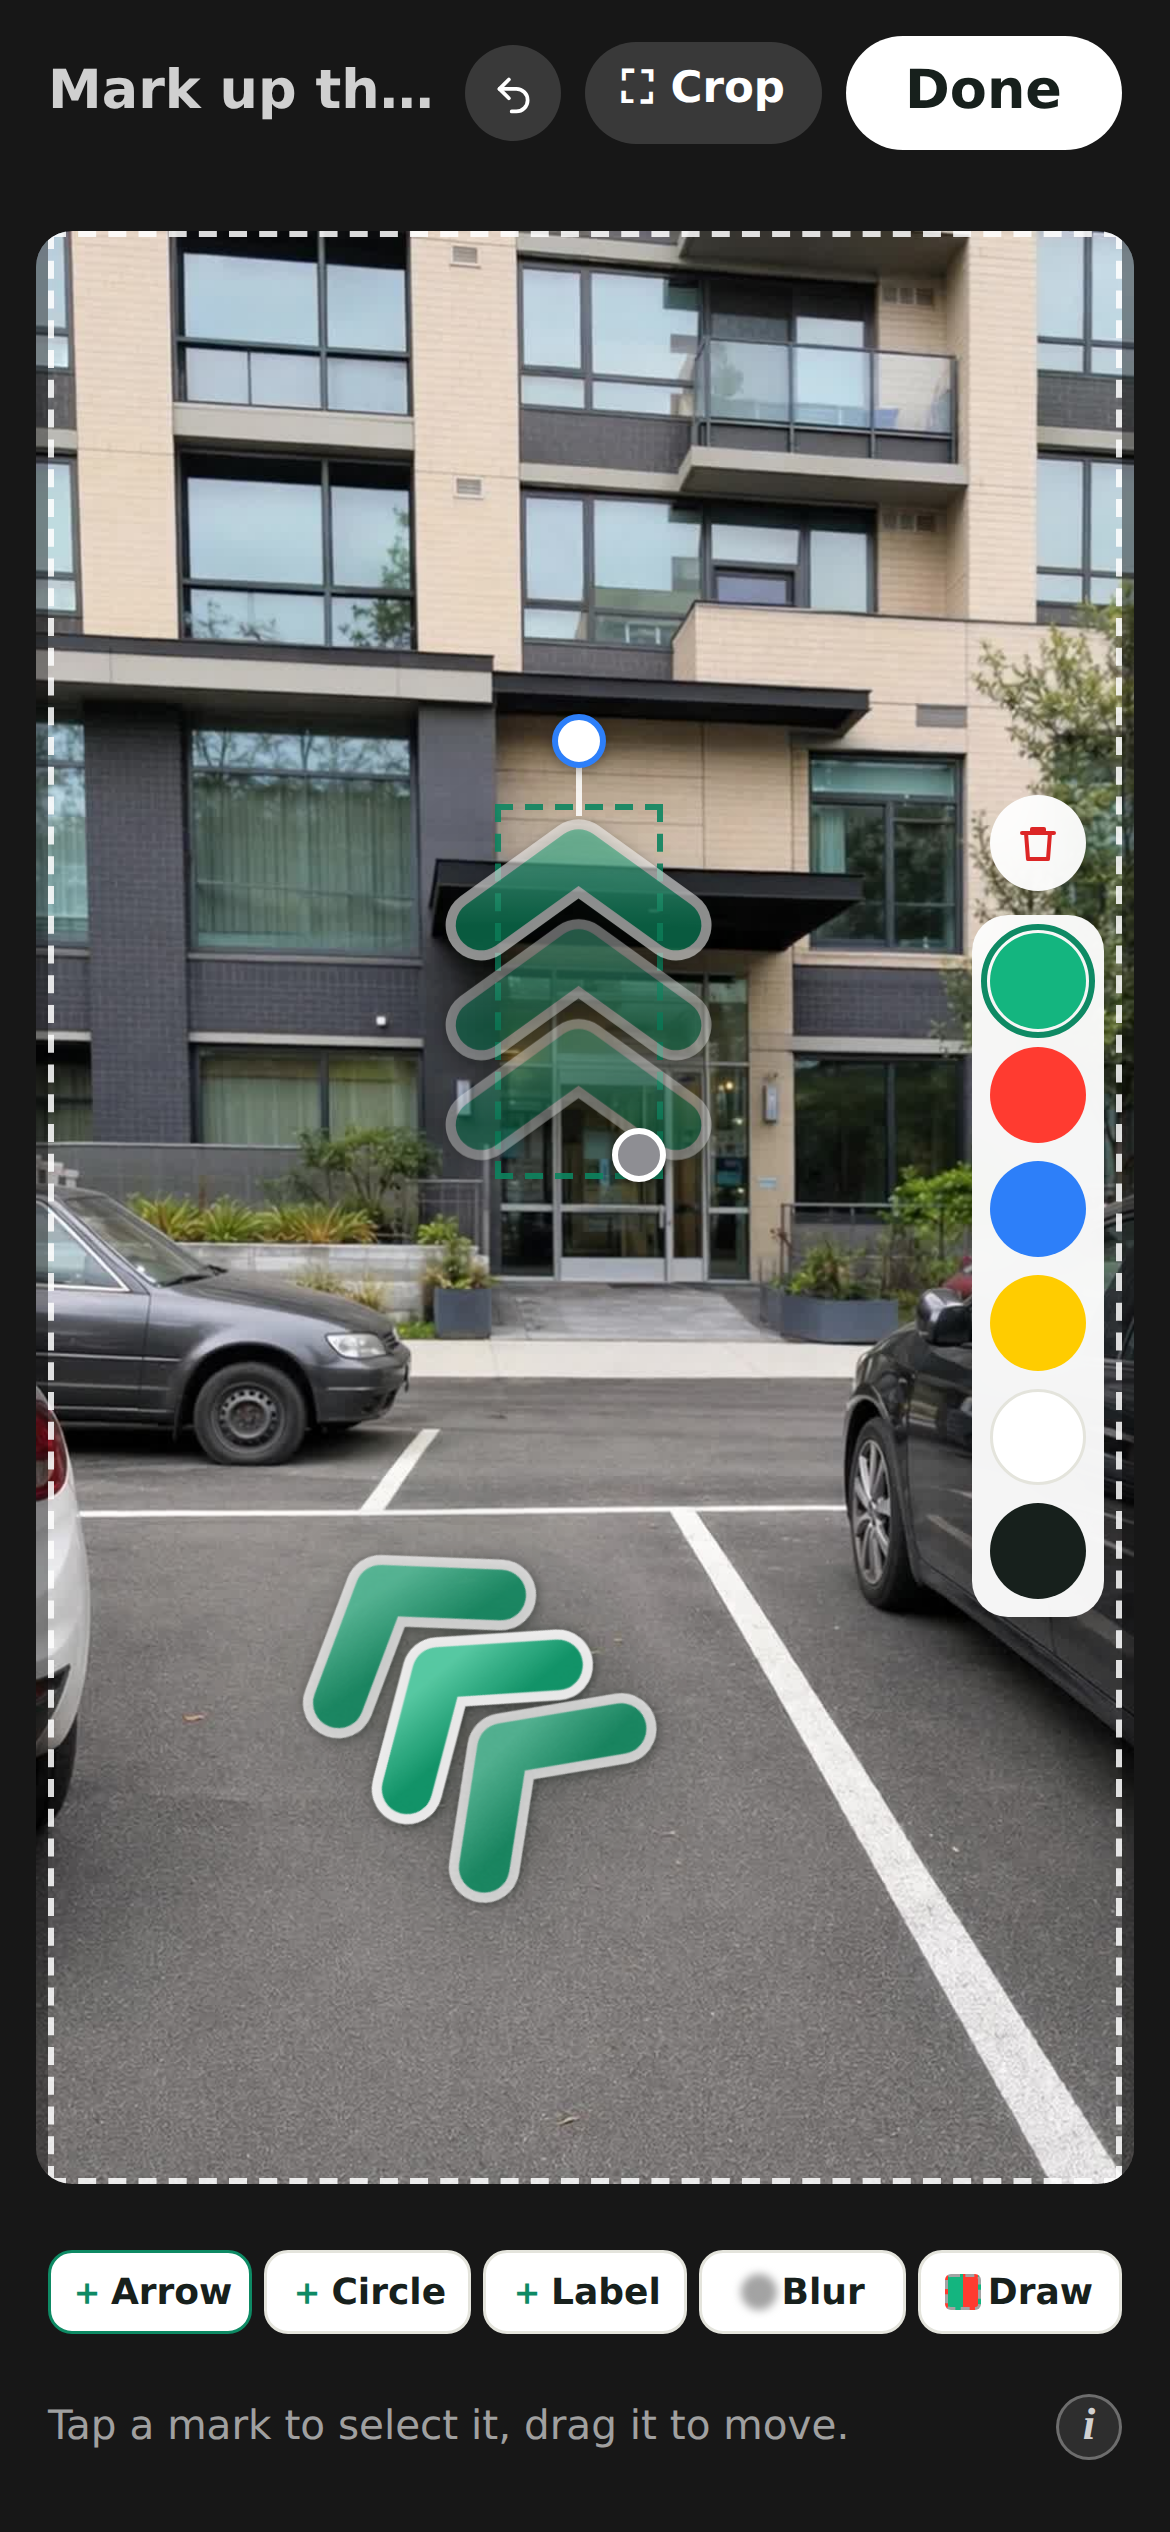
- 2Drop an arrow on the turn, a circle on the buzzer or handle, and a label for a name or number.
- 3Drag to move, pinch to resize, then tap Done.
💡Write the instruction as if you were talking: "Past the blue gate, then immediately right." Short beats formal, and since it is the only line under the photo, keep the one detail that makes the spot findable in it.
You can also drop in a video of the walk and let mikum.me pull the frames out for you. The wizard offers this next to the photo button.
What your visitor actually sees
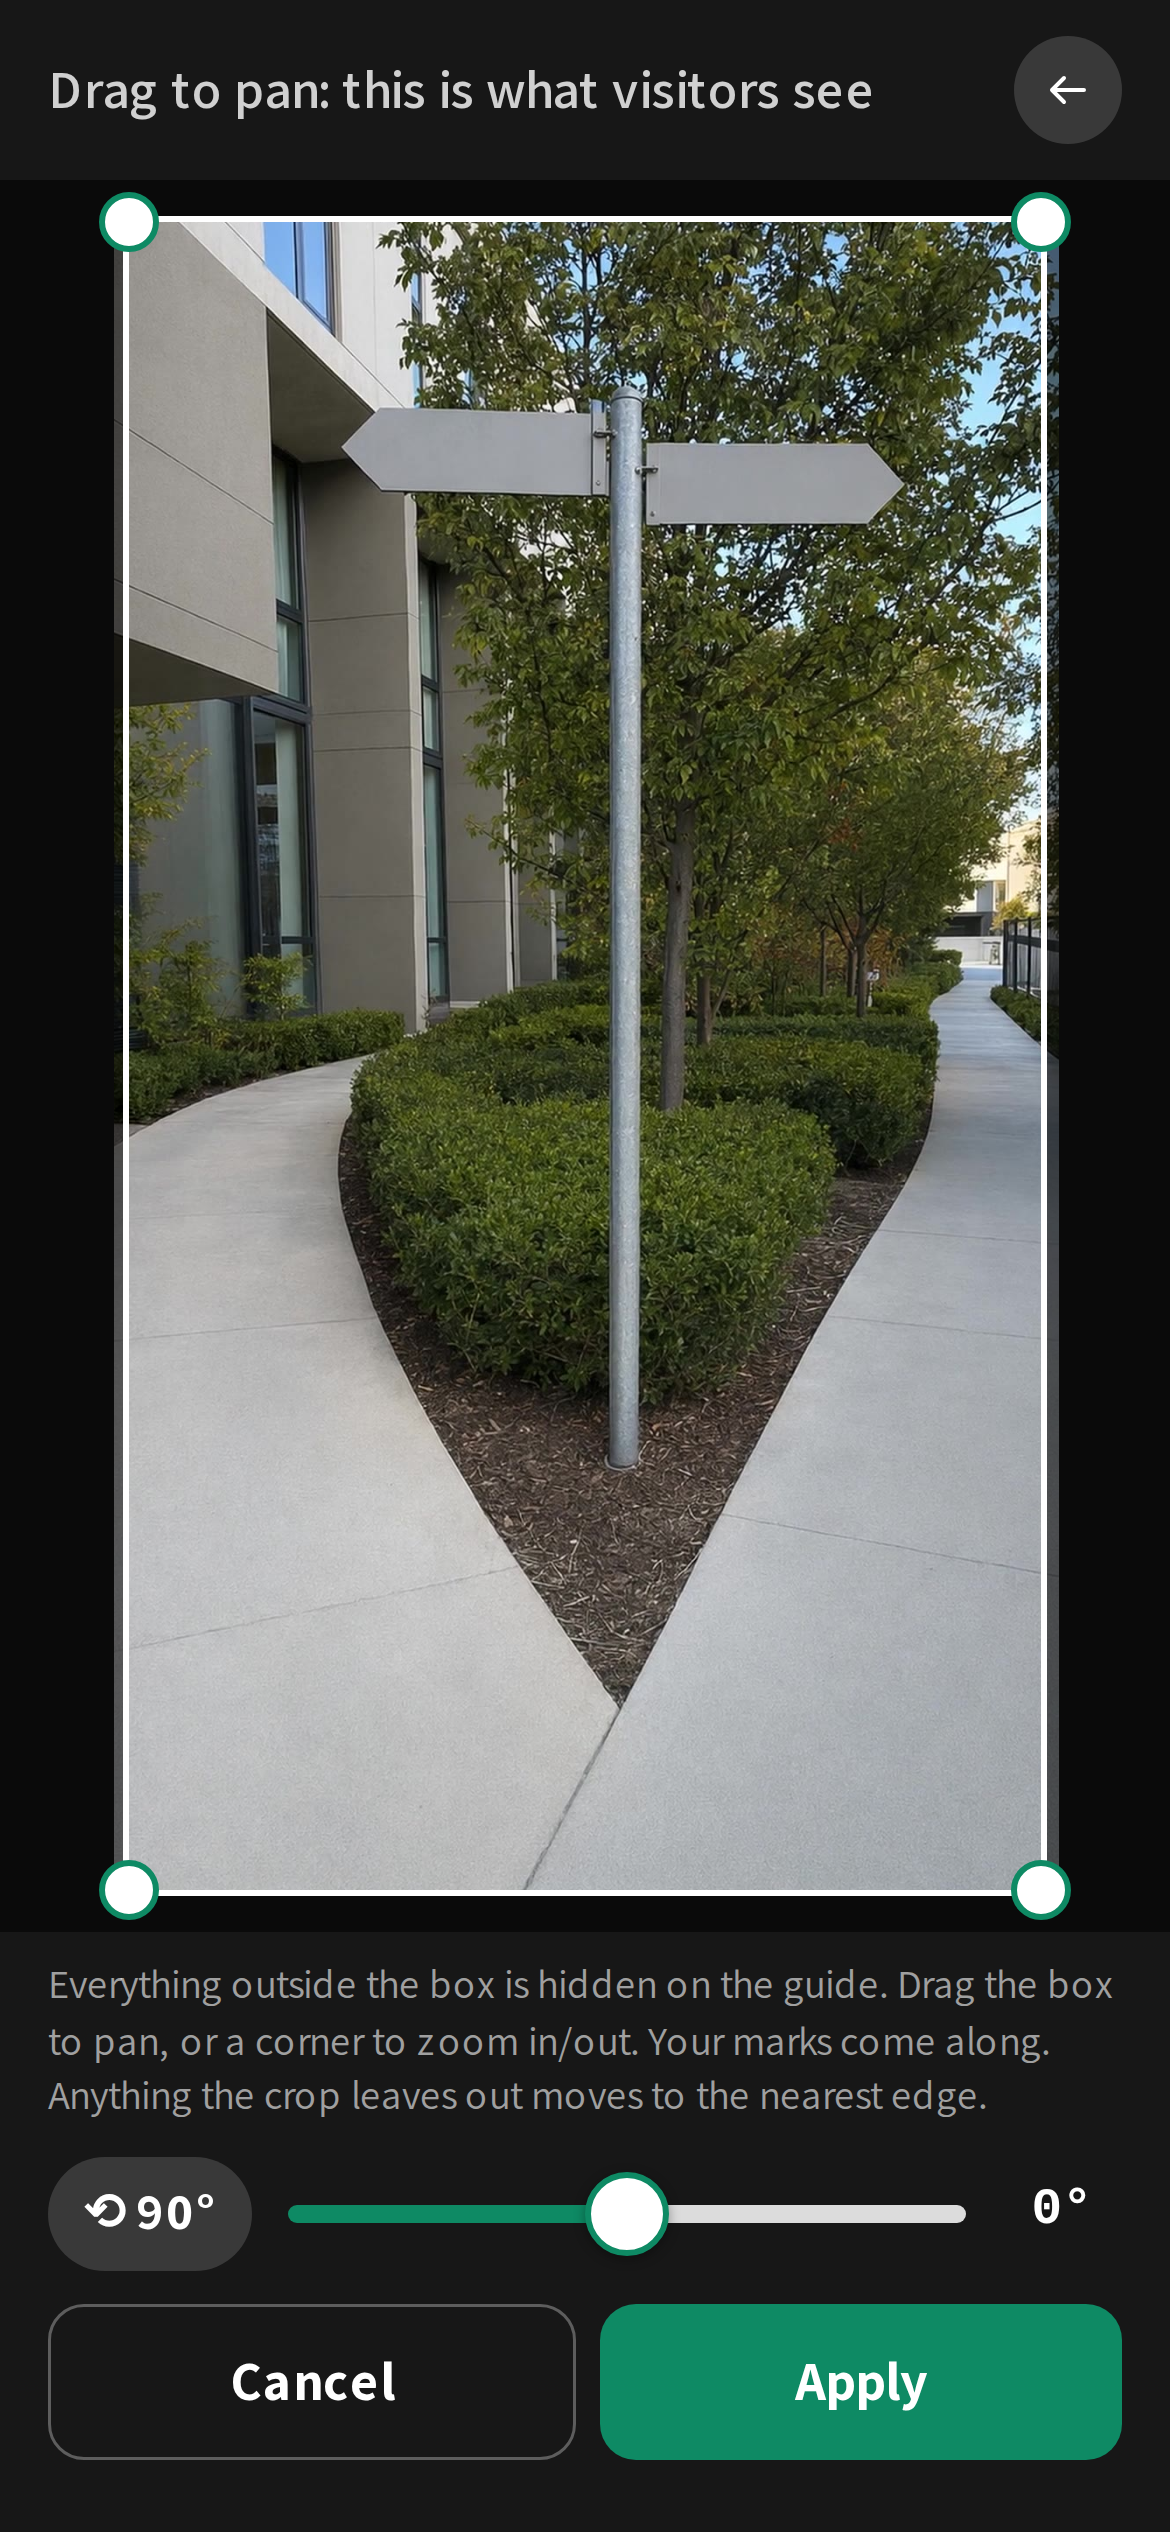
The guide fills the whole phone screen, so a photo of a different shape is zoomed in slightly and its edges are cropped off. While you mark up a photo, a dashed frame shows exactly the part that stays visible. Keep your arrows, circles and labels inside it. Anything you place outside is simply never seen. Prefer to choose exactly what shows? Tap ⛶ Crop in the toolbar above the photo. There you can drag and zoom the frame, turn the photo 90°, and straighten a tilted shot. ↺ Reset to original, next to it, brings the untouched photo back. Cropping keeps the arrows, circles and labels you already placed. Anything the crop leaves out slides to the nearest edge, and you can tap Crop again at any time: it re-opens on the original photo with your last crop still selected, so you can widen it again just as easily as tighten it.
After you have sorted them
On a brand-new guide the photo list has exactly one job: get the photos in and put them in walking order. Tapping a row there does not open anything yet. When the order looks right, tap the green button at the bottom. mikum.me then shows you your guide the way a visitor sees it, one photo at a time, so you can write each instruction in place.
💡Coming back to this list later to edit a guide you have already built, tapping any row jumps straight to that photo.
"Looks like the same photo"
If you add a picture that is already in the guide, an amber line appears under it on the photo list naming the photo it repeats, for example "Looks like the same photo as 2. Delete?". Tap Delete to drop the extra copy, or Keep if you meant it (the same door at both ends of a walk is a fair reason) and we will not ask about that photo again.
💡It is only ever a question. We never remove a photo by ourselves, and two different photos of the same wall are not treated as duplicates.
The last photo has no arrows
The final photo is the arrival screen: the guide draws a big ✓ and "You've arrived" over it, so arrows, circles and labels are not shown on that one, and the editor no longer offers them there. Everything you want to say about the door goes in its instruction instead.
💡Blur still works on the last photo. It hides a face or a name on a letterbox rather than pointing anywhere, so the guide keeps it on every step.
Removing the ✓ from the last photo
The arrival ✓ is optional. Open the last photo's mark-up screen and you will see it exactly as your visitor does. Tap the ✕ on it to take it off this guide, and "Show the “you've arrived” ✓ again" to bring it back.
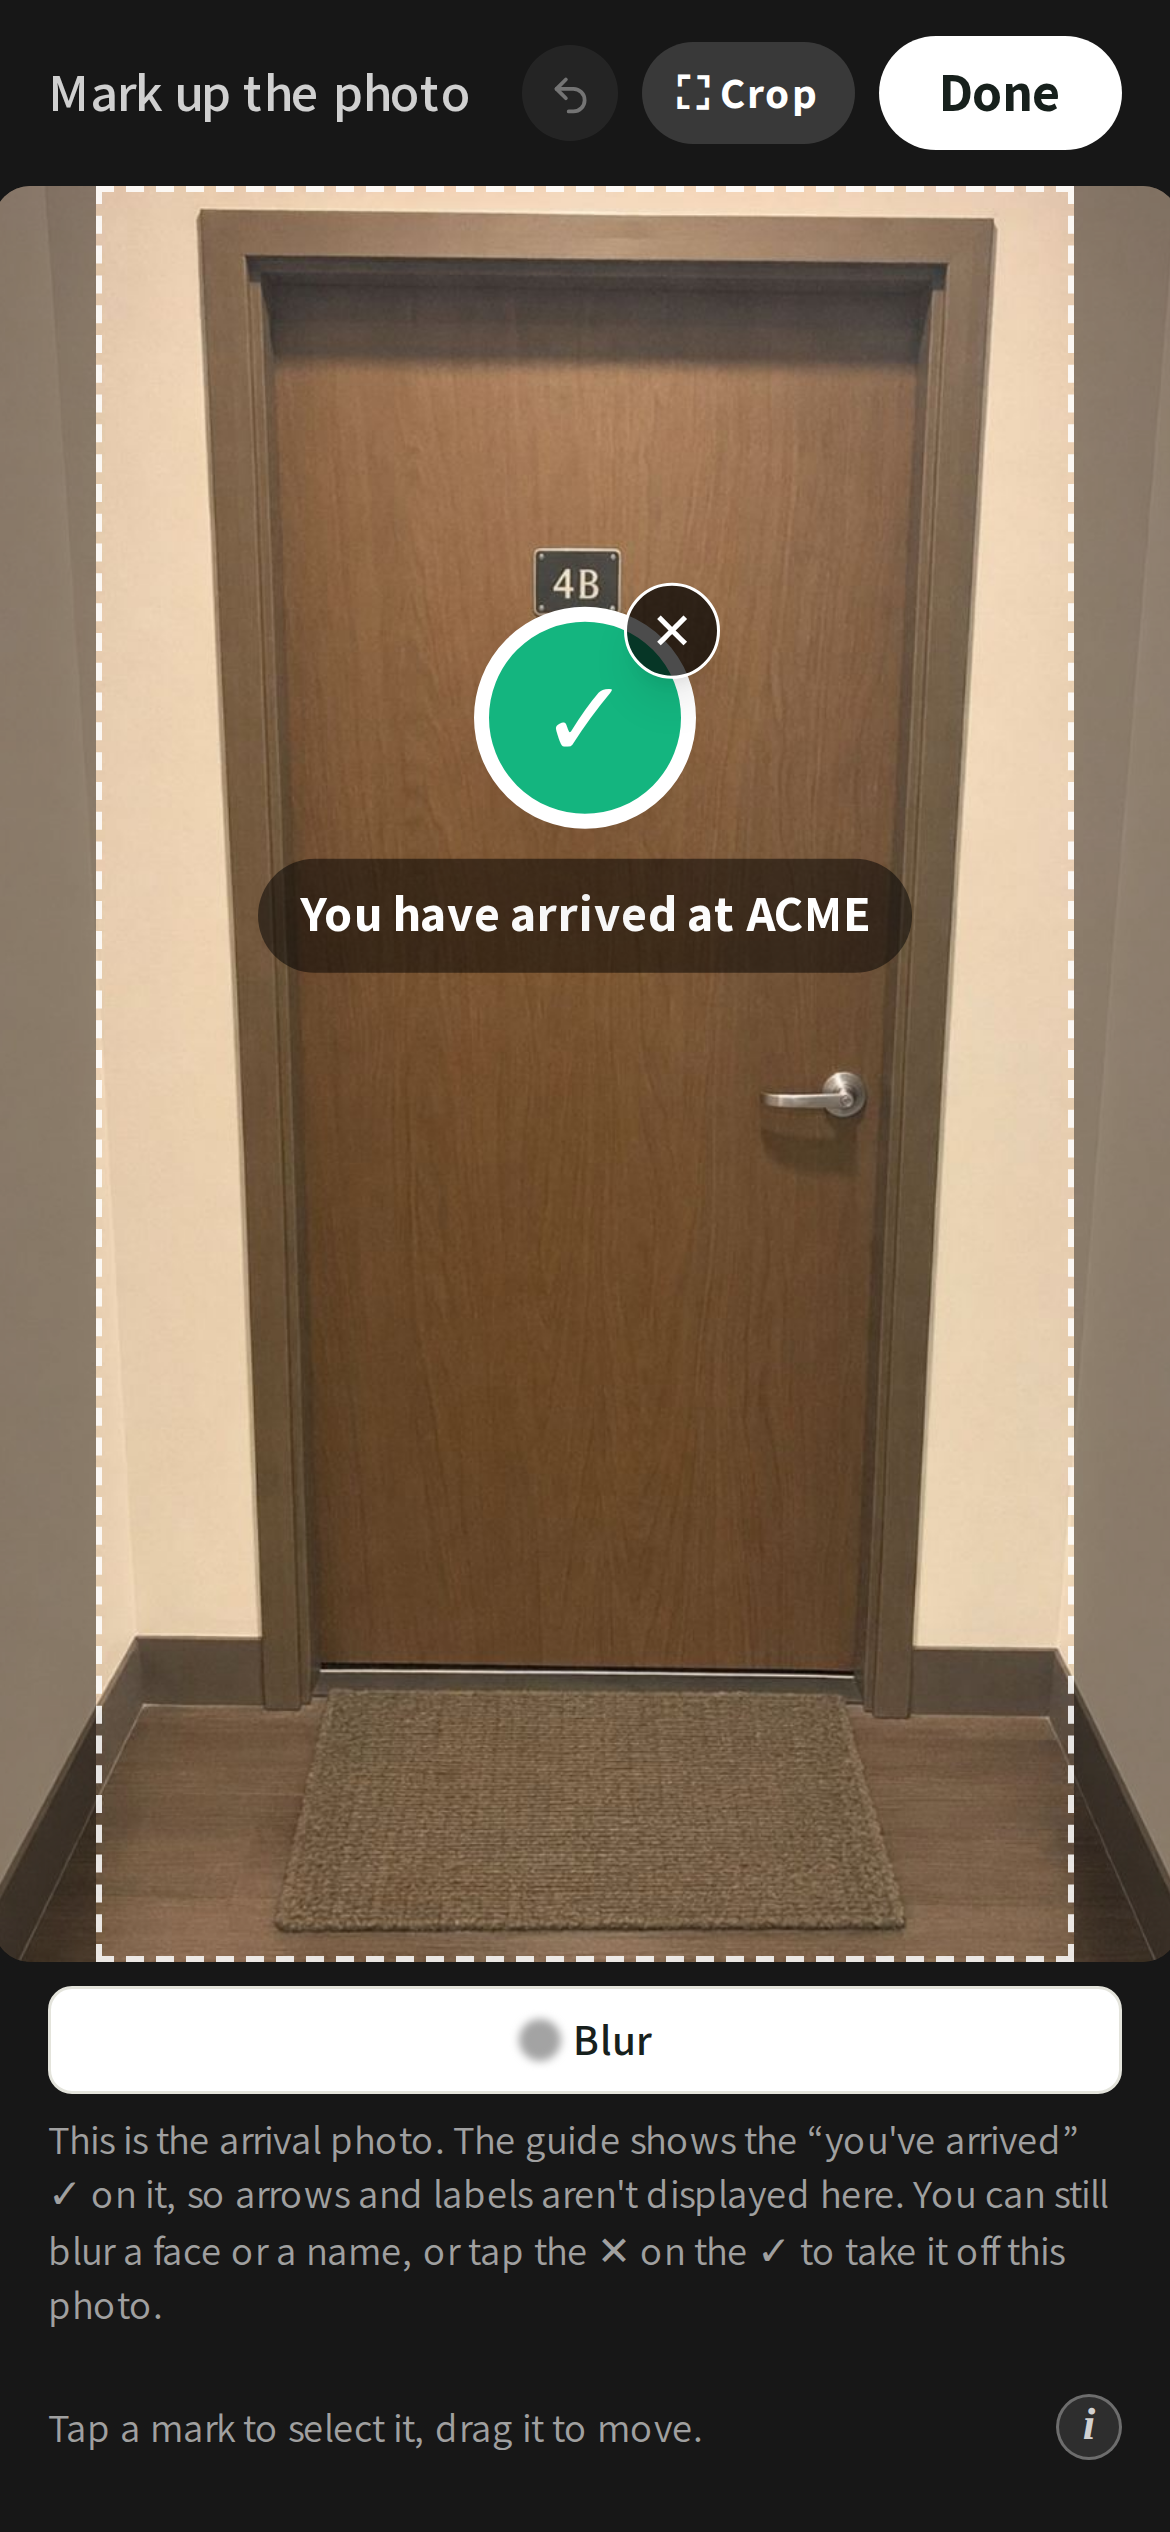
💡With the ✓ removed, the last photo is an ordinary step again: arrows, circles and labels are offered in the editor and shown in the guide, just like every other photo.
Took a wrong turn? Undo it
Undo, at the top of the mark-up screen next to Done, puts back what you had a moment ago: the arrow you just dragged, a colour you tapped, a label you resized, even a mark you deleted. Tap it again to go back another step.
💡Undo works for as long as you stay on the mark-up screen, so finish the photo before you tap Done. Cropping starts a fresh page: once a crop is applied, Undo goes back to the changes you make after it.
Drew a box? Hold still and it snaps straight
Nobody draws a straight line with a finger. Finish drawing a box-like shape and hold your finger completely still on the screen for a moment, without lifting it. The outline snaps straight right there, at the angles you drew it (a rectangle if that's what it was, but a real trapezoid stays a trapezoid, just a tidier one). Keep holding still and lift to keep it; move your finger again first and it goes back to your own outline.
💡This only kicks in for closed, box-like shapes: a circle, a triangle or a squiggle stays exactly as you drew it, however still you hold. Everything else about the mark (its colour, its size, where it sits) is yours to change afterwards either way.
Pinch to zoom in on the photo
Placing an arrow on the right doorway sometimes needs a closer look, so you can pinch the mark-up screen to zoom into the photo and drag your mark exactly where it belongs. While you're zoomed in, a slim bar with Done stays pinned across the top, so the way out is never off-screen.
💡This is the only screen that zooms. Everywhere else the app stays at one size on purpose: a zoomed page used to hide the buttons at the edges of the screen. Tap Done and the page goes back to normal size. If your phone hangs on to the zoom anyway (some do, once you've pinched with your own fingers) pinch back out and it stays there.
Dropped a photo in the wrong place?
Right after any drag, the ↩ undo arrow lights up in the bar at the top of the screen, next to the save mark. Tap it and the list goes back exactly as it was before that drag. Changed your mind about the undo? ↪ redo puts it back again. Both arrows stay there for as long as you are on the photo list, so there is nothing to catch before it disappears.
Deleted a photo by mistake?
The same ↩ undo arrow lights up right after you delete a photo from the list. Tap it and the photo comes back where it was, with its instruction, markup, code and any ⧉ links it had. It is not a bin you can come back to later, though: leave the photo list and the delete is final.
One line per photo
Each photo carries a single instruction: the line the visitor reads under it. There used to be a second "more detail" box below it; it is gone, and the one field is two rows tall so a full sentence fits comfortably. Write what to do and the detail that makes the spot findable together: "Up the stone steps, then left past the blue door" beats a short command with a footnote.
💡Anything you had already typed in the old detail box is safely stored, it simply is not shown any more. Copy the part that still matters into the instruction and the photo reads exactly as before.
The ↻ next to a photo
While mikum.me writes the instructions, each photo shows a small spinner until its line lands. If it cannot write one (the photo is too dark to read, or the AI is having a bad minute) the row stops spinning and says "Couldn't write this one" with an amber ↻ beside it. Tap the ↻ and it tries that one photo again; nothing else in your guide is touched.
💡The same ↻ appears on every photo still without a line after you tap Skip, I'll write them. Skipping stops the queue, it does not write anything, so if you change your mind about one particular photo, the ↻ is there to ask for just that one.
Adding more photos, or a moment from a video
Every group in the photo list ends in a dashed + Add photos box. Each starting point has one, and so does the shared Everyone continues here walk at the foot of the list. Tap the box where the photo belongs and choose Take or choose a photo or A video: what you add is put in that group, so there is nothing to drag afterwards.
- A video opens the scrubber for the clip you pick, at the end of the list the box sits at, and the moment you choose joins that same group.
- ⠿ still works: drag any photo to another spot, or into another group, whenever you like.
Which photo shows on your link
The last photo you added when you first built the guide is its cover — the picture on the link's card in WhatsApp, on the guide's own opening screen, and on its card in your dashboard. Last on purpose: that photo is the door the visitor is walking to, which is what makes your link recognisable at a glance, while the first one is usually a street the whole neighbourhood shares. That is decided once, when you first add photos, and then it stays put: a photo you add later for a step you were missing — or dragging the list into a different order — will not move it.
- Tap any photo's ☆ to make that one the cover instead. It turns into a solid ★ and stays there from then on, whatever you add or re-order afterwards.
- The cover carries whatever you drew on that photo, so an arrow, a label or a blurred face shows on the link card too.
💡Chat apps hold on to a link's preview for a while. If you change the cover and paste the same link again straight away, the old picture can still turn up — see “Share your guide”.
Last updated Aug 24, 2026